Head to your ActiveCampaign account to get started!
You’ll need to gather both the API URL and the API Key.
How to obtain your ActiveCampaign API URL and Key
- Copy your ActiveCampaign URL and Key items to a notepad, or leave the tab open and head back to your Spiffy account in a new tab
- In Spiffy, click on Settings > Integrations in the bottom left navigation
This integration supports enabling Deep Data Integration to sync order data to your Active Campaign contacts. This feature requires that you have a ‘Plus’ account or higher with ActiveCampaign

- From the list of available integrations, find and select ActiveCampaign

- This will open the Integration Settings, where you will enter the API Key and URL that you obtained from your ActiveCampaign account. Just enter this information, and click Connect ActiveCampaign

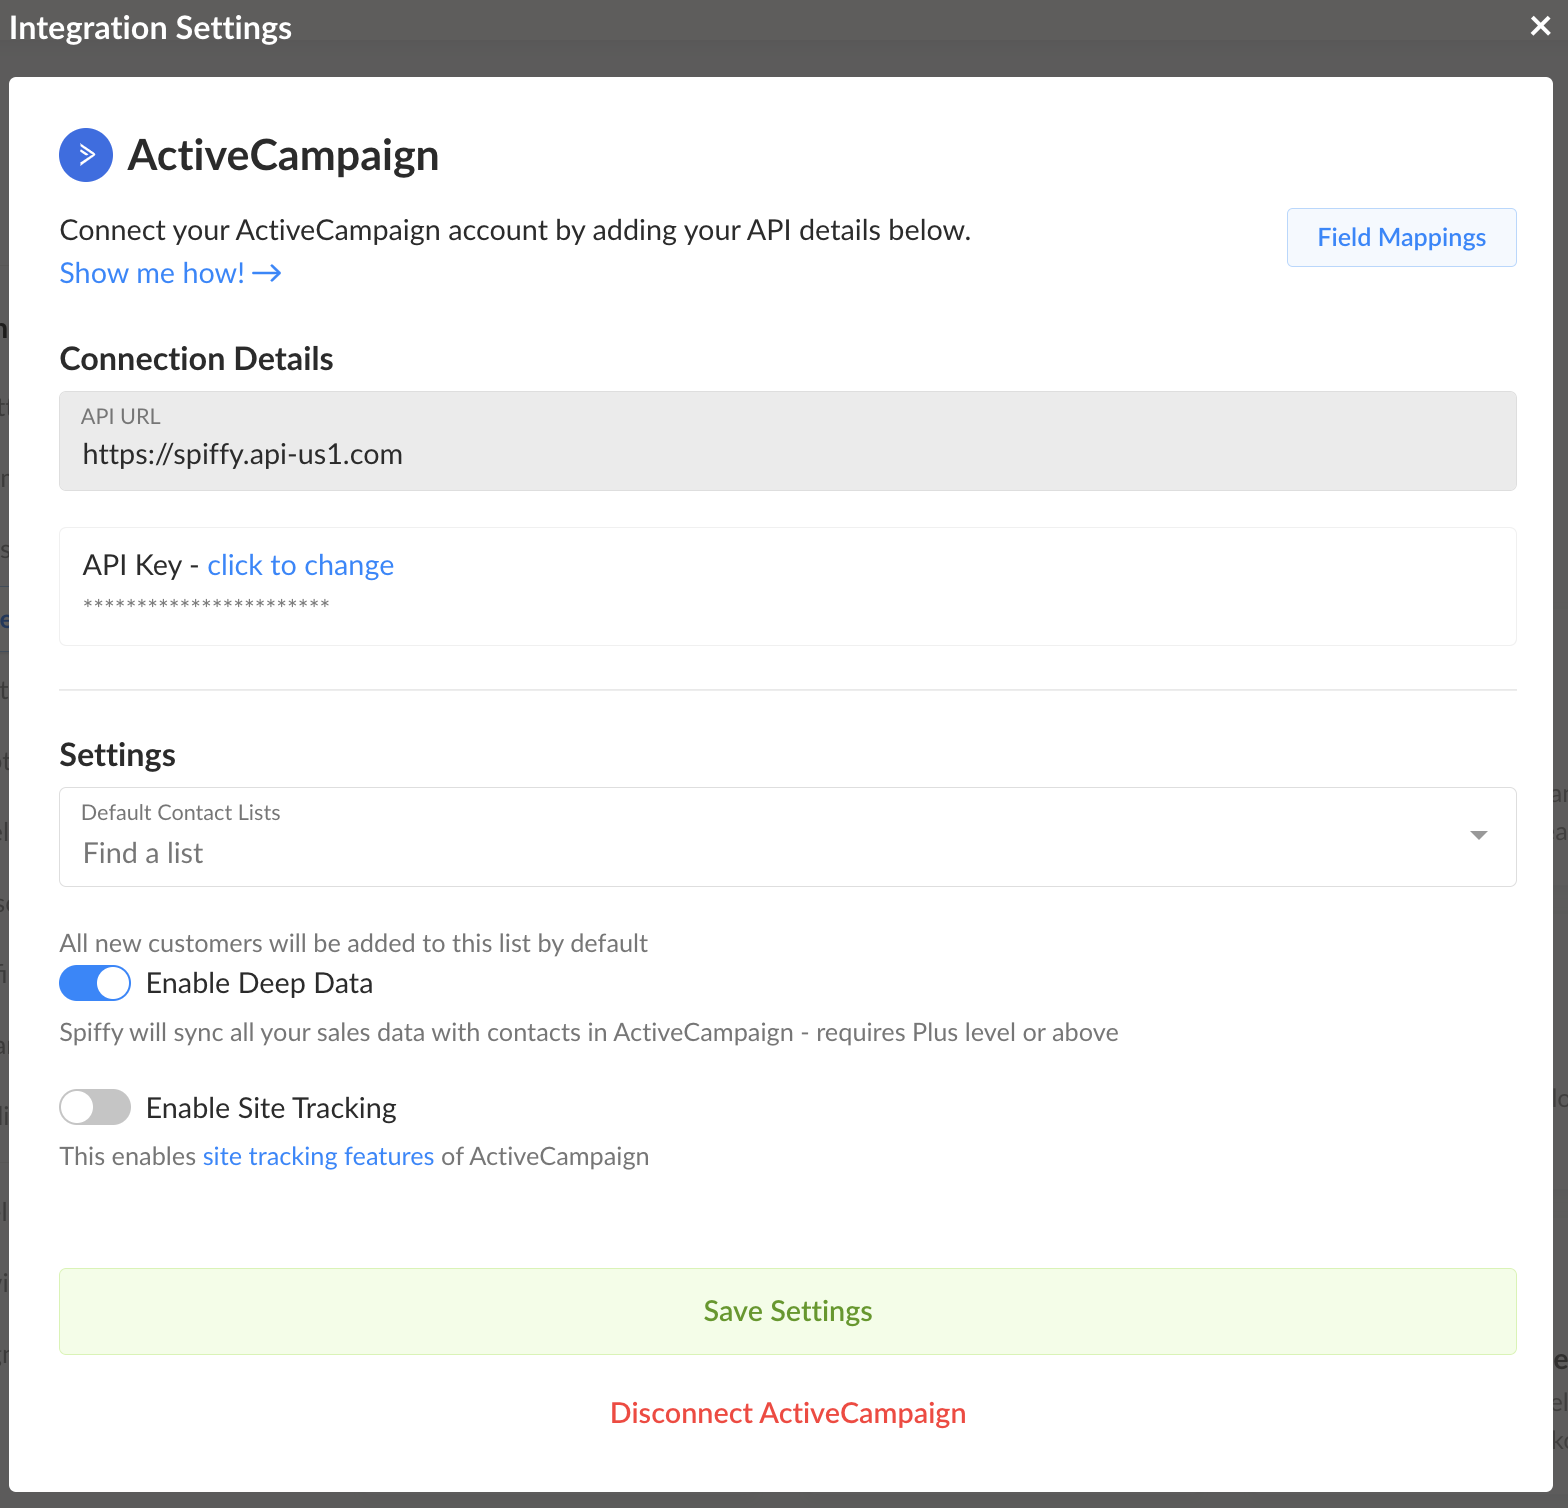
- Once connected, you will see a confirmation, along with some additional options to configure

- Default Contact Lists: You can select a single list or multiple to automatically add contacts to, when orders are placed. While Add to List is also an available integration action, if you primarily add contacts to a specific list, this option will help save time in the future, as you won’t need to set up Add to List automation
- Enable Deep Data: Sync sales data with contacts in ActiveCampaign: This requires that you have a Plus level account with ActiveCampaign. For more info on how the Deep Data integration works, click HERE
- Enable Site Tracking: Will enable ActiveCampaign’s site tracking features. For more info, head over to ActiveCampaign’s documentation on SiteTracking.
Once configured, just click Save Settings and you are all set!
With ActiveCampaign connected, you can now start utilizing Spiffy’s Checkout and Billing automation to trigger actions in ActiveCampaign for your contacts.