Fields store information about customers and orders and seamlessly map to integrations.
Fields are in charge of storing and sending information. They’re typically used in conjunction with text inputs or options that you add to your checkout to collect info during the checkout process.
There are two types of Custom Fields:
- Custom Order Field
– shown on the Order Record, Subscription Record and Payment Plan Record, and can NOT be overwritten if a customer makes multiple purchases - Custom Customer Field
– shown on the Customer Record and can be overwritten if a customer makes multiple purchases
Table of Contents
Add a Field
By default, a number of fields exist in your account already but you can also add custom ones as needed.
- In the left navigation menu, select Fields.
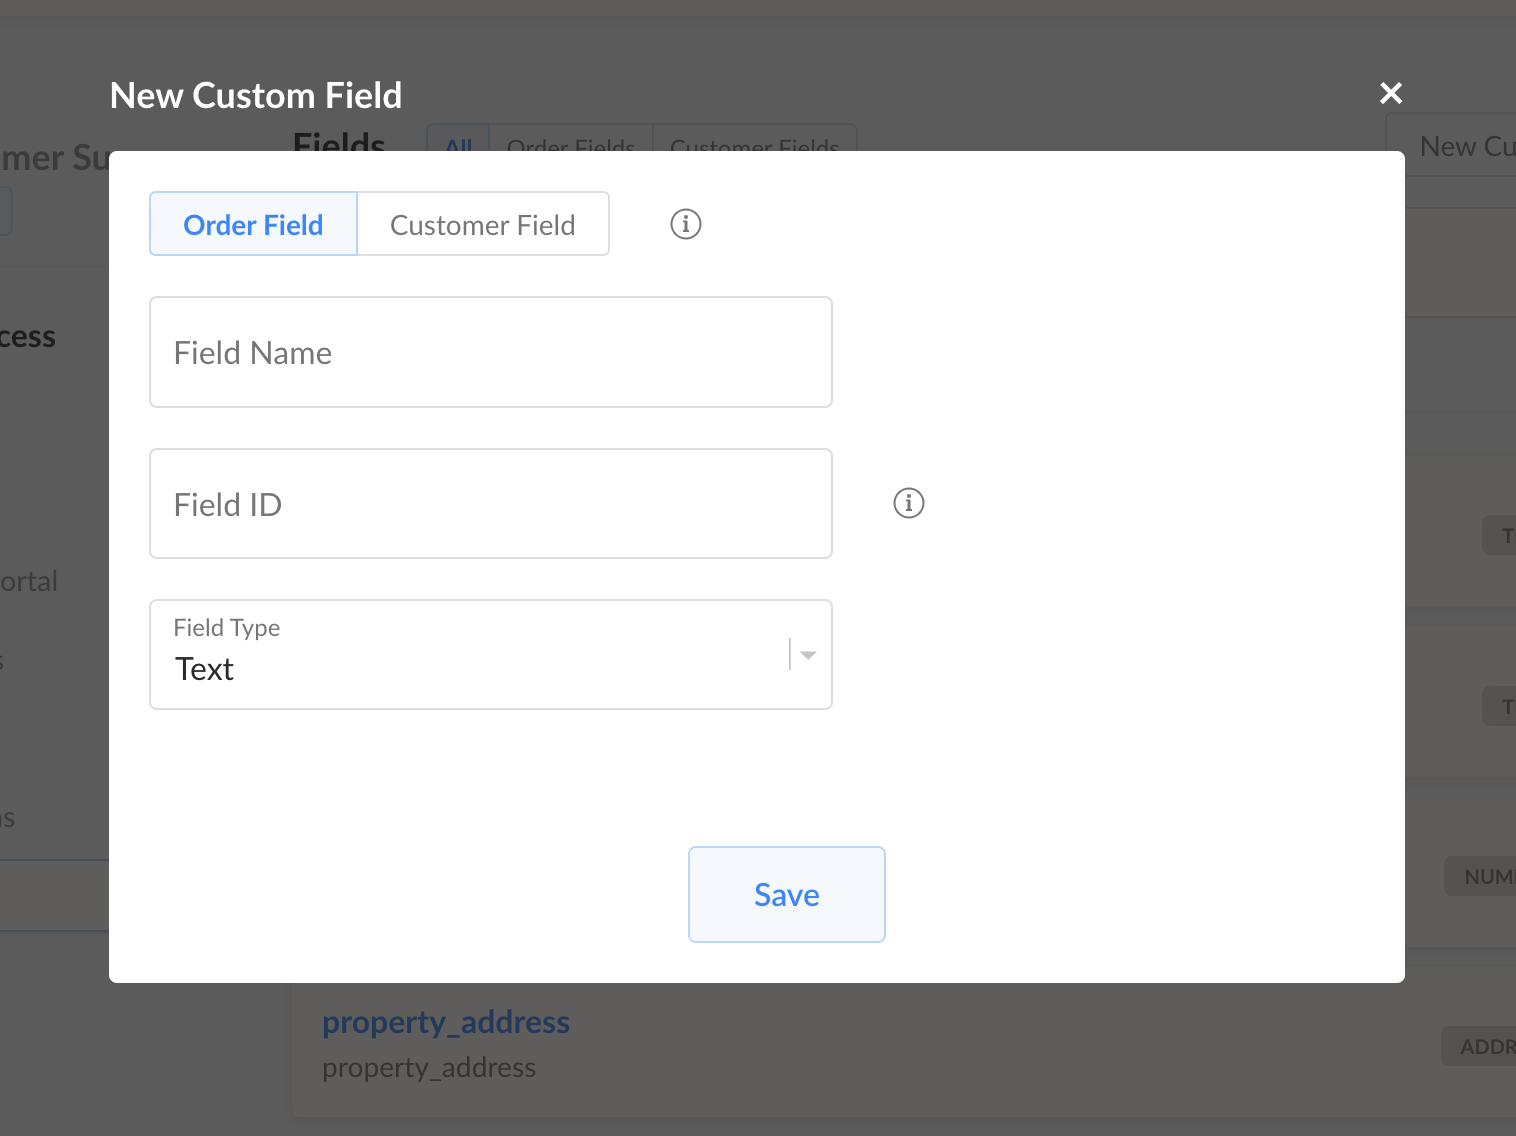
- Click New Custom Field.
- Choose where to save this field – Order Field or Customer Field (Order fields will store in individual orders. Customer fields will store in the Customer’s record, and can be overwritten if the customer fills out the field on a future checkout.)
- Set a field name
- Optionally edit the Field ID
- Choose Field Type

Pro Tip: In your checkout you can directly select fields from your integrations to send data to other places. You can also map a field to multiple integrations.
Map to an Integration
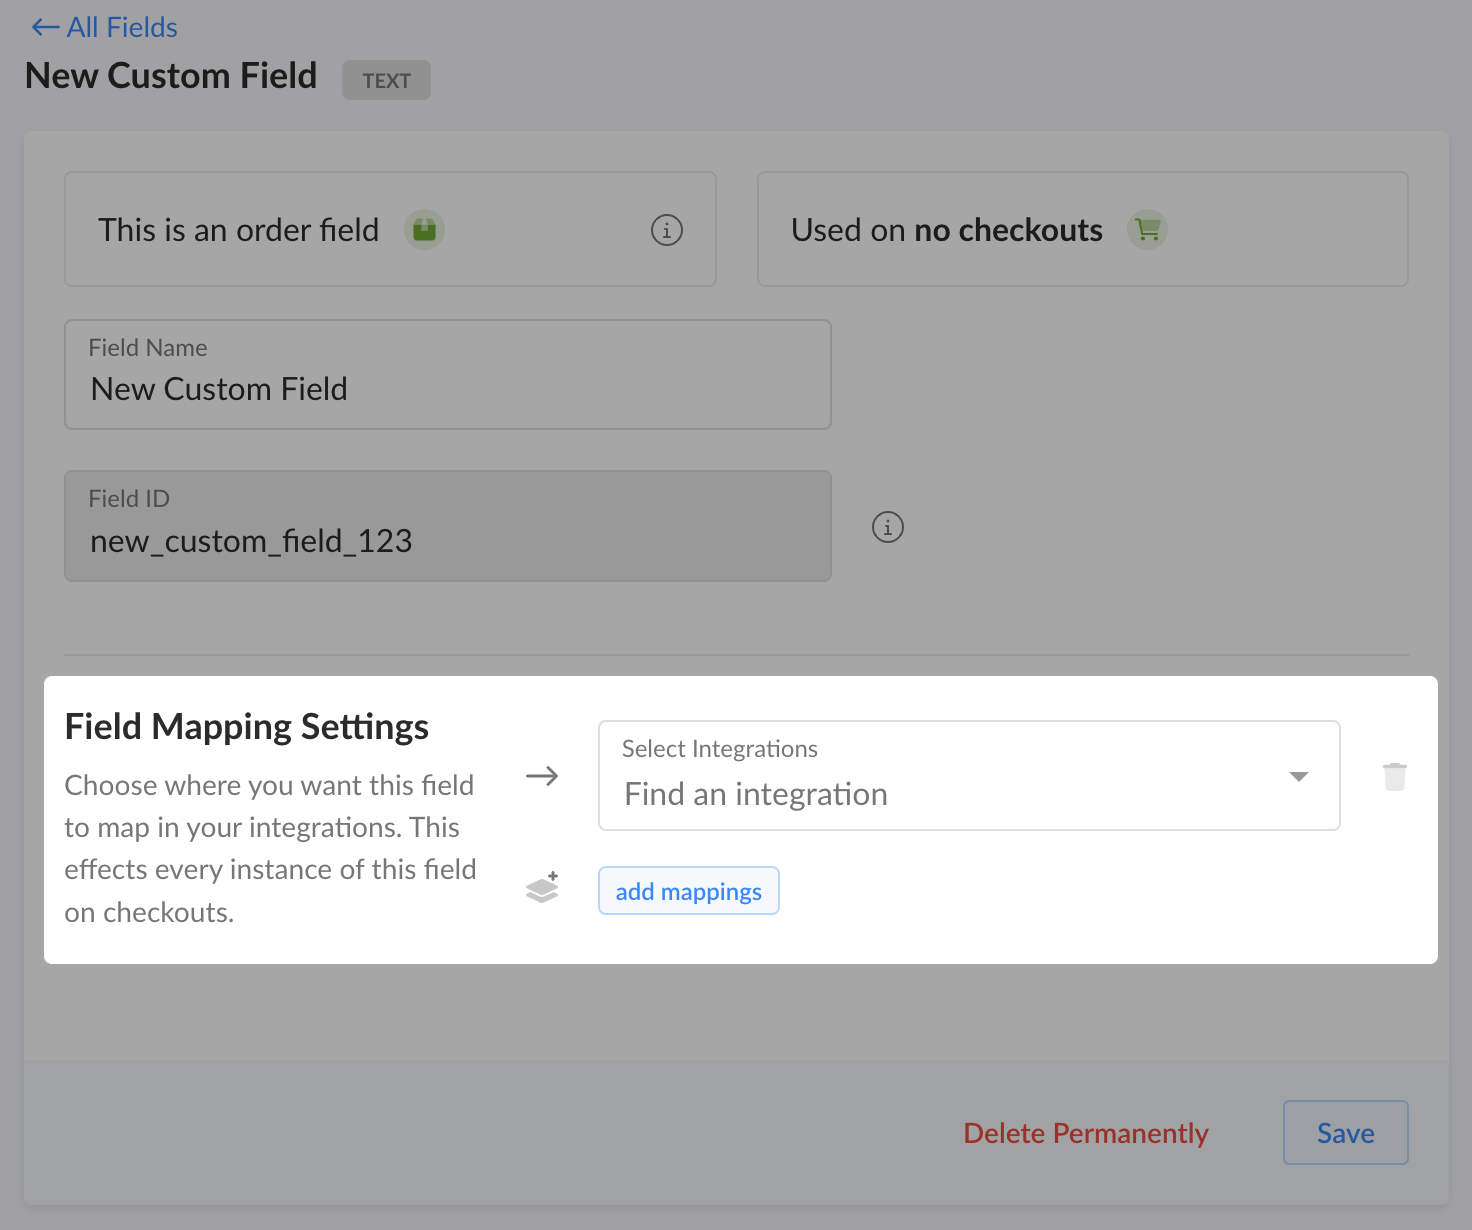
If you have connected a supported integration to Spiffy, you can start mapping fields in Spiffy to fields in your integrated system.
When you map a Spiffy field to an Integration Field in your Spiffy account Field Settings, any time that field is added to a checkout, Spiffy will automatically sync the data to the selected field in your integrated system.
- Click on a Spiffy Field. This will open up its configuration.
- Use the Integration dropdown to select an integration, followed by a field. (Note: Some integrations have field categories. If this is the case select a category, followed by an available field.)
- When finished click Save.
Now, whenever the field is used on checkout, Spiffy will automatically sync input data to your integrated system.
