Options let customers make selections on your checkout.
Adding a Checkbox, Radio, or Dropdown options list to a Checkout is a great way to collect more information in a single tap or click.
You can also add Price Modifiers to options that change the total price based on what option a customer selects. Price Modifiers can be one-time payments or subscription plans.
Table of Contents
- Option blocks
- Add an Option block
- Style an Option block
- Add & Edit Options
- Add Price Modifiers
- Add Automation
- Save selections to a Field
- Bulk Import
Option blocks

There are different blocks that utilize Options, the most basic of which are Radios, Checkboxes, and Dropdowns. Checkboxes are unique in that they allow customers to choose multiple options.
There are some blocks that use options in a unique way; the Subscription block makes it fast to add one or more subscription options to your checkout, the Payment Plan block allows you to add financing options, and the Terms & Conditions block lets you add terms to your checkout.
Add an Option block
You add option blocks to your checkout just how you add any other block. Option blocks can be added inside and outside of sections.
- Click Add Section or Add Block in the editor canvas
- Click Options
- Choose what type of option block to add
Style an Option block
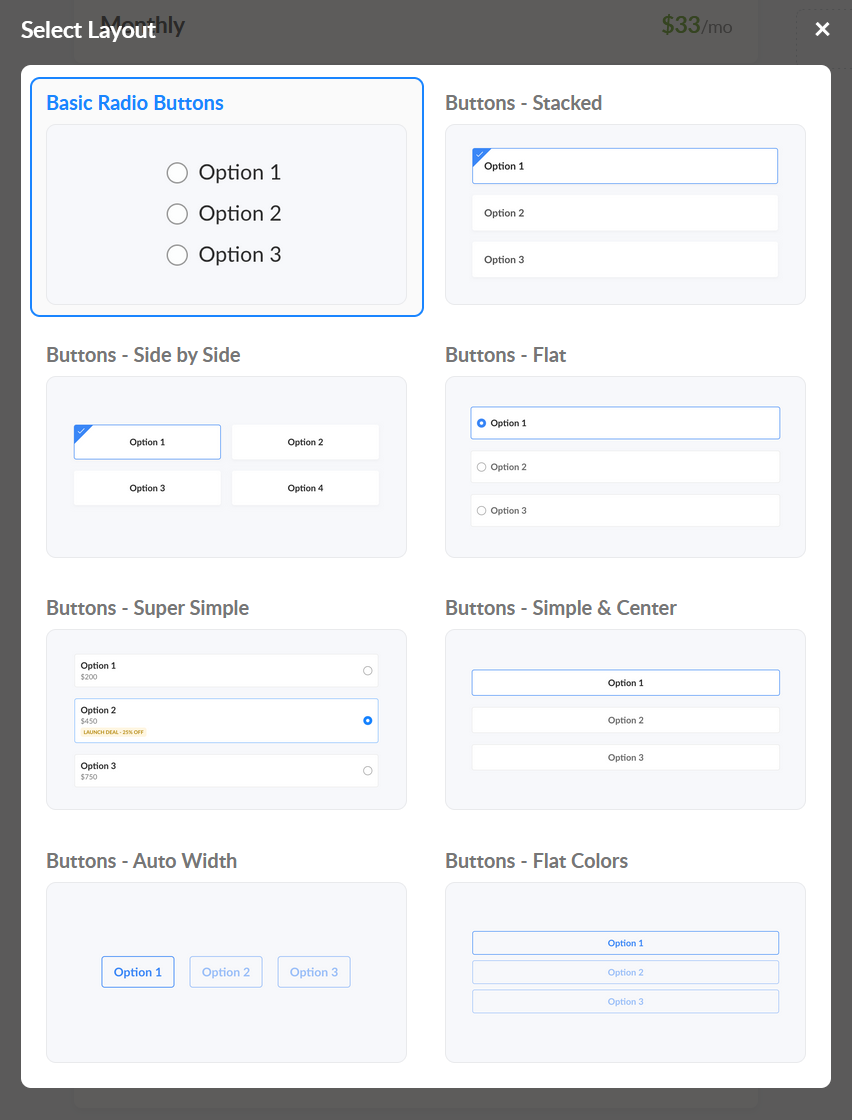
Most Option blocks utilize block layouts to give flexibility on how the block looks on your checkout. You can turn basic bland checkboxes into pretty selectable buttons, and you can edit option width settings to stack your options horizontally or vertically.

Want to add images?
Use the Side by Side layout to add images to each selection in your options block.
Add & Edit Options
In the block Settings panel for any option block you’ll see the Options Manager:

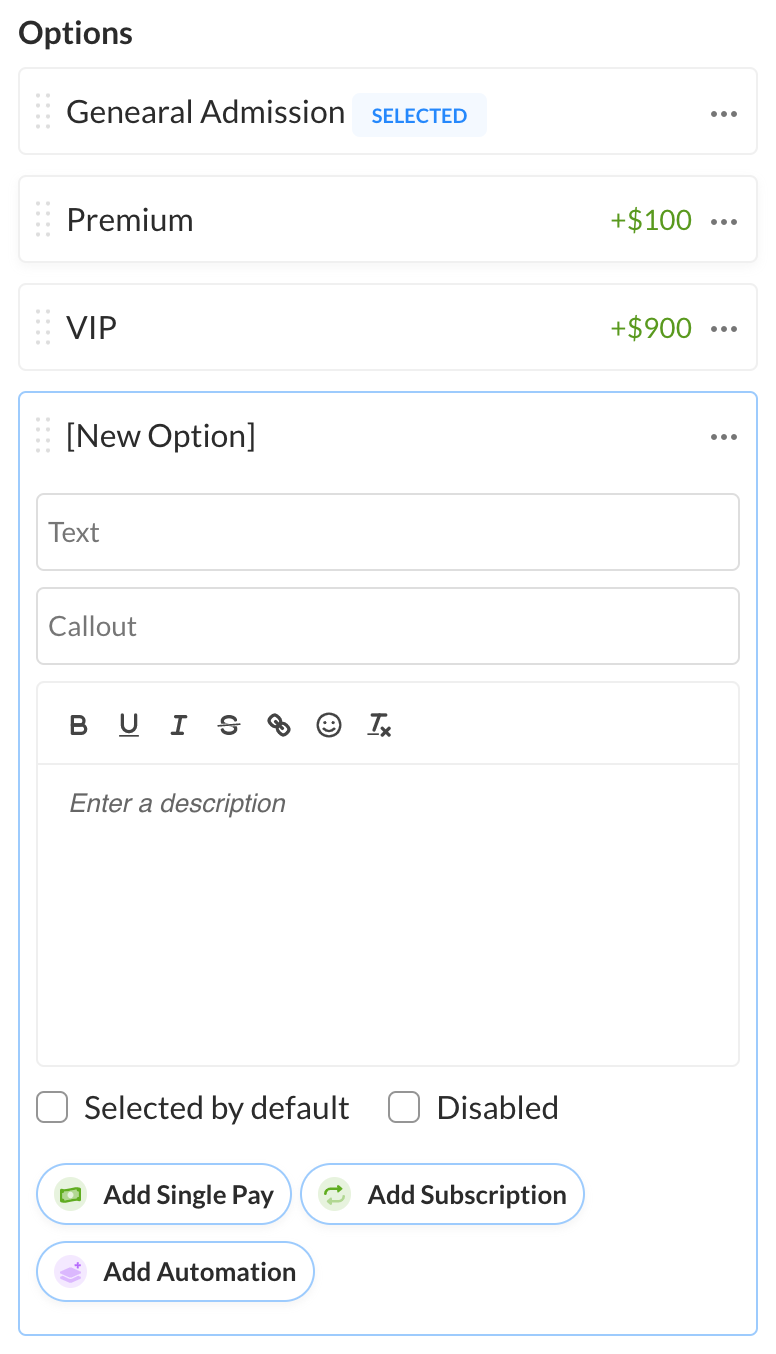
The Options Manager is where you can add, reorder, and edit settings for each individual option of this block.
Add Price Modifiers
Price Modifiers make it possible to apply prices to specific options. When your customer selects the option, it will add that item option to the order summary and update the total.
Add Single Pay adds a one-time payment amount to a specific option. This can be a Single Product or a Custom Line Item.
Add Subscription adds a subscription plan amount to a specific option.

Hide Prices
To hide prices for your options, use the Dropdown layout. In the item settings for the options block, go to More Settings and toggle on Hide Prices. This will remove prices in the dropdown list, however the checkout total will reflect the option selected.
Add Automation
On all option-based blocks, you’re able to set up automations to run when a customer selects your addon—for example, add the customer to a course, add a tag in your CRM, or start an email sequence.
Open the block Settings panel, click into the Option Manager, and then use the quick add menu on any of the options and select Add Automation.

Save selections to a Field
Much like inputs, option selections can also be saved to fields. In the block’s Settings panel click “Save selections to a field” and choose the Field to save to.
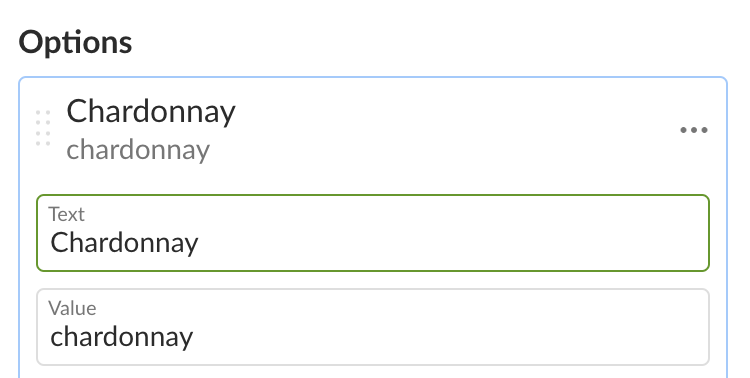
Then in each option’s settings, you can set the static value of that selection which gets saved to the field and shown on the customer or order records.

You can use these settings to auto-select specific Checkout Options & Subscription Plans with URL parameters.
Learn more about using URL Parameters to select Checkout Options.
Bulk Import

Available for Spiffy Business accounts
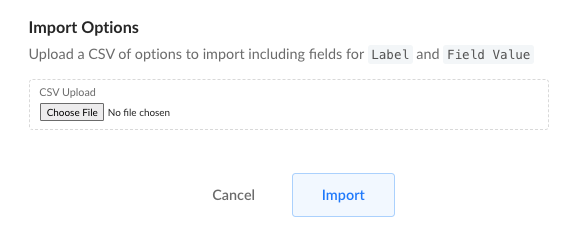
When adding an option to your checkout with a long list of multiple selections, you can easily do this with our Bulk Import feature. Simply list all of your selections in a CSV file and add them to your checkout with one click. The Bulk Import of options will retain the same order as the rows in your CSV file.

The CSV file needs to have two columns: Label and Field Value
- Label is what options will be shown on the checkout for the customer to select.
- Field Value is the text that will be stored when options are mapped to a custom field.
Bulk Import can only can be used to add options that do not have an impact on price. Any price modifiers and automation will still need to be set up manually.