


Meta Pixel (formerly Facebook Pixel) lets you receive information about the actions that are taken on your checkout, giving you insights to make your Meta ads more relevant to your audience.
With Spiffy’s Meta Pixel Integration, you will be able to analyze the data compiled in Meta to make any necessary changes to your Meta Ad targeting, and get a clear view on how your ads are performing.
Once you have set up and connected your Meta Pixel, you will also have the option to connect Meta’s Conversion API, for more reliable tracking. Just head over to our Meta Conversion API Overview, for more info!
Table of Contents
- Connecting Meta Pixel to Spiffy
- Adding your Meta Pixel ID
- Adding Your Domain to Meta Business to obtain verification meta-tag
- Meta Pixel Events / Event Testing
- Next Steps – Meta Converion Pixel (Conversion API)
Connecting Meta Pixel to Spiffy
When connecting Meta Pixel to Spiffy, you will need two things:
- Your Meta Pixel ID from your Meta Events Manager to connect with Spiffy
- A meta-tag from your Meta Business Manager to verify your Spiffy domain
Adding your Meta Pixel ID
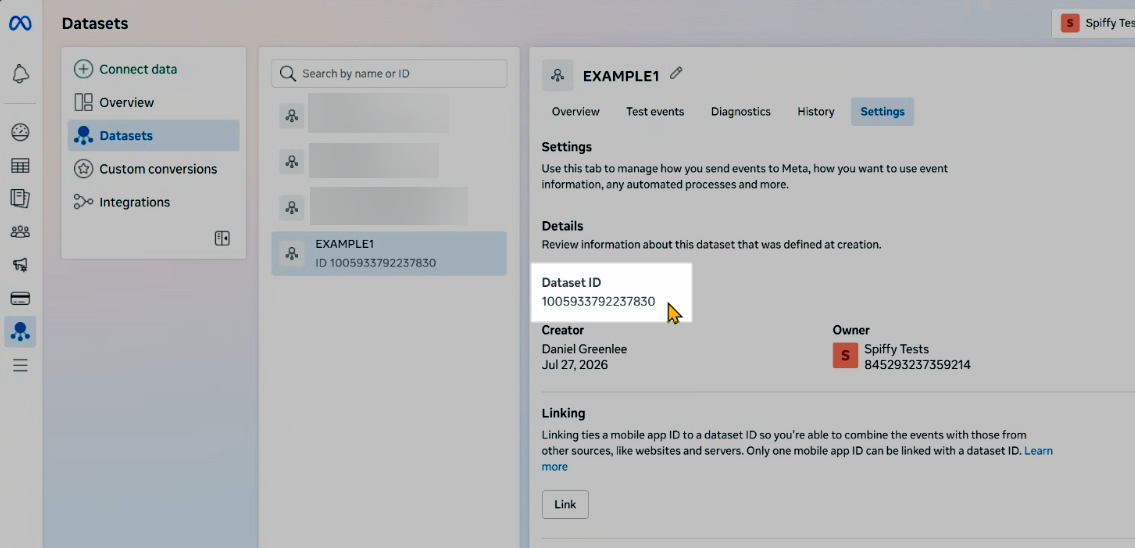
In your Meta Event Manager, find and copy the Meta Pixel ID you want to connect with Spiffy.
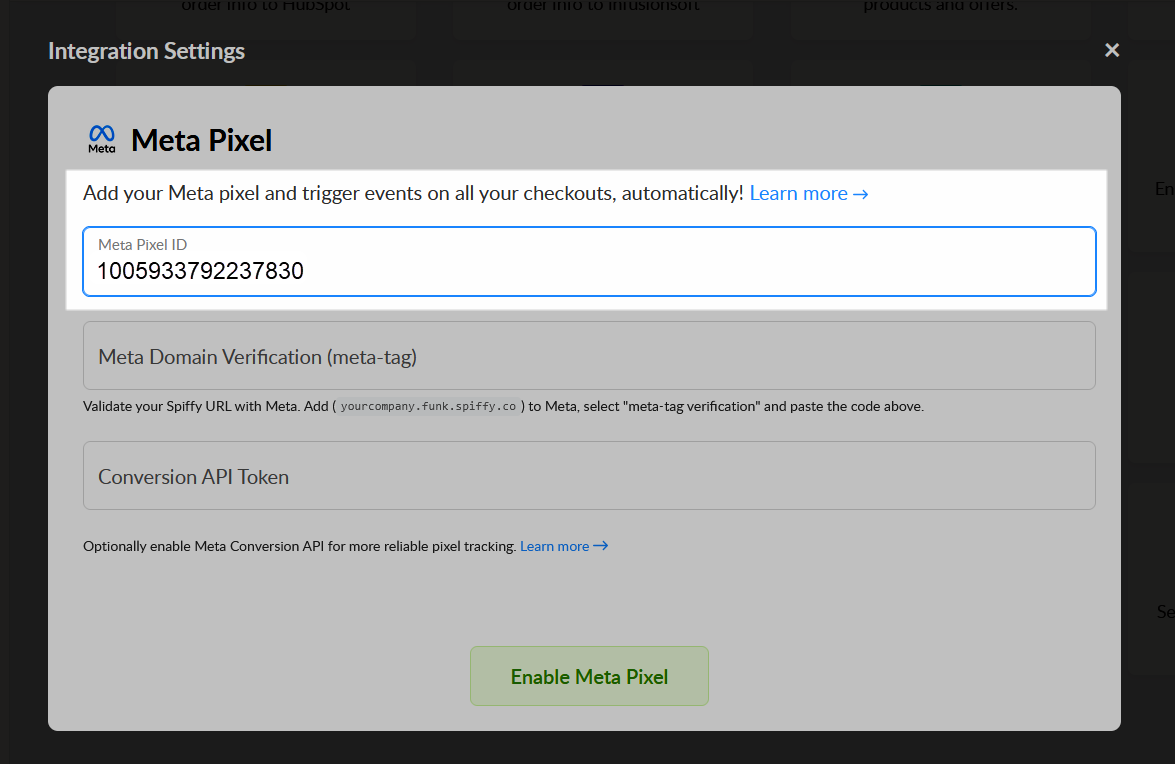
Back in Spiffy, paste your Meta Pixel ID into the Integration Settings.
Adding Your Domain to Meta Business to obtain verification meta-tag
Validating your Spiffy Checkout domain is now required when integrating Meta Pixel. You will be able to quickly add your Spiffy Checkouts domain and get validation meta-data all from the Meta Business Center.
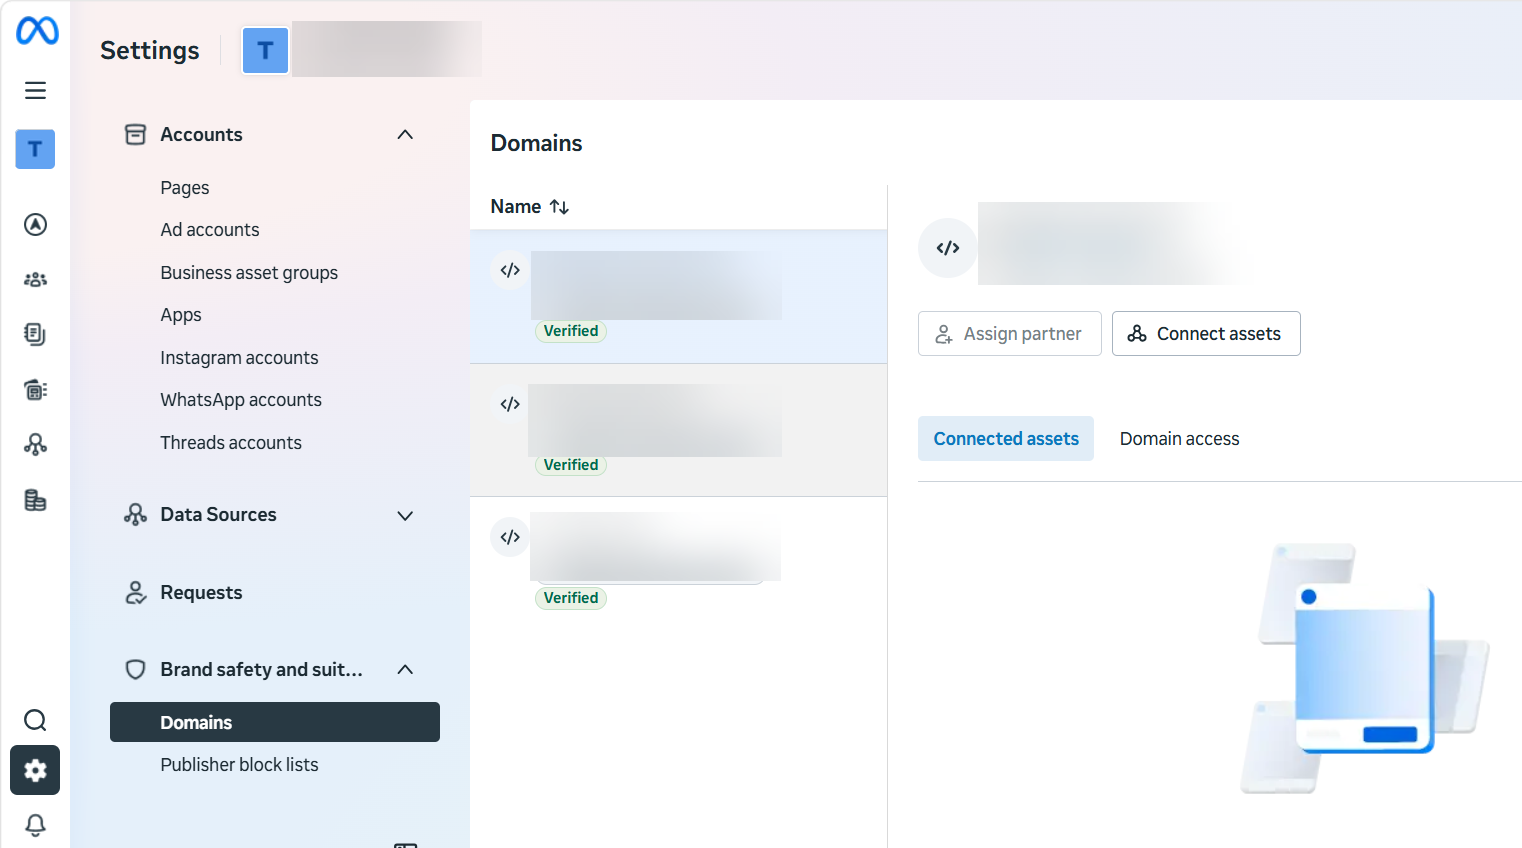
In your Meta Business Settings, under Brand Safety select Domains and click Add.
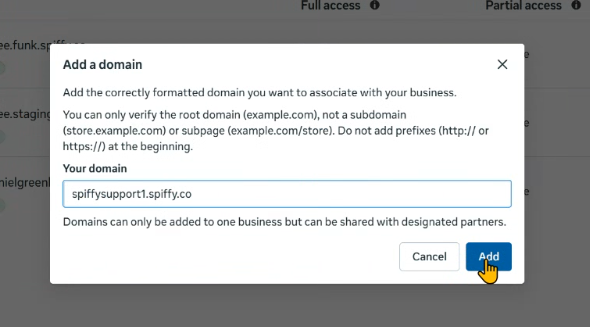
Enter your Spiffy Domain Name, excluding https://(e.g marketingpro.spiffy.co) and click Add Domain
Select Meta-Tag verification for the domain and copy the provided meta-tag. Don’t close this page, as you will be back in a moment to verify your installation.
Note: If you don’t see domain options after adding your Spiffy Checkouts domain, you may need to refresh the Meta Business Settings page.
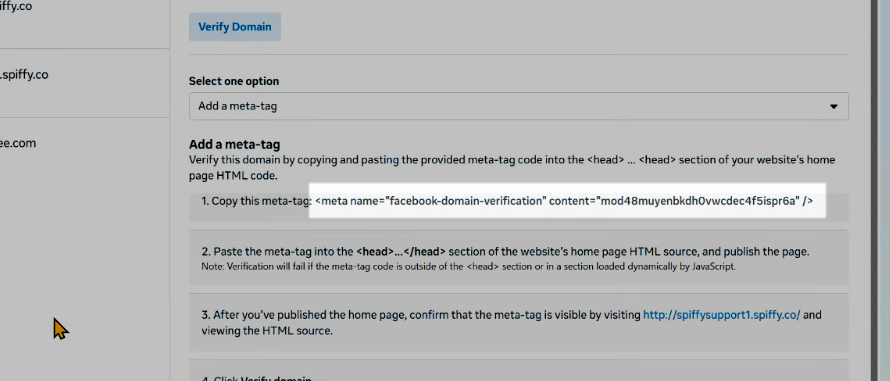
Back in Spiffy, paste the copied meta-tag into the Integration Settings and click Save Settings.
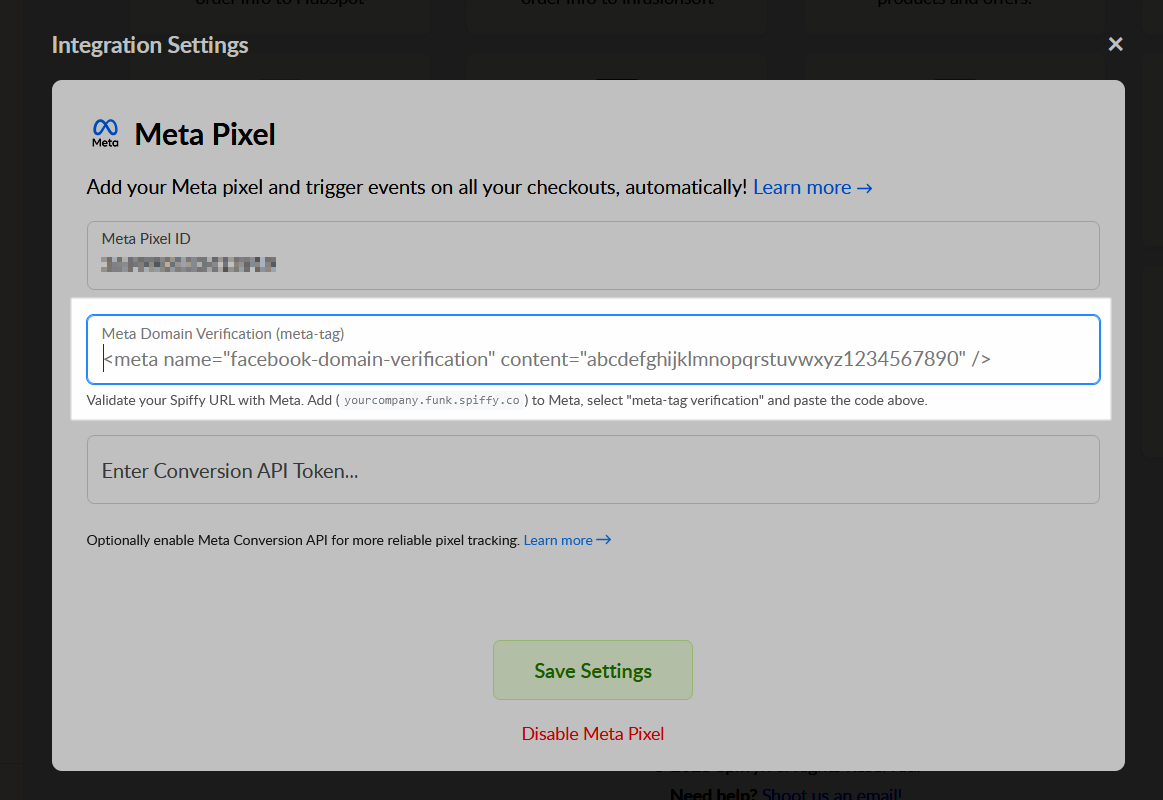
Once the settings are saved, navigate back to your Meta Business Settings and click Verify.
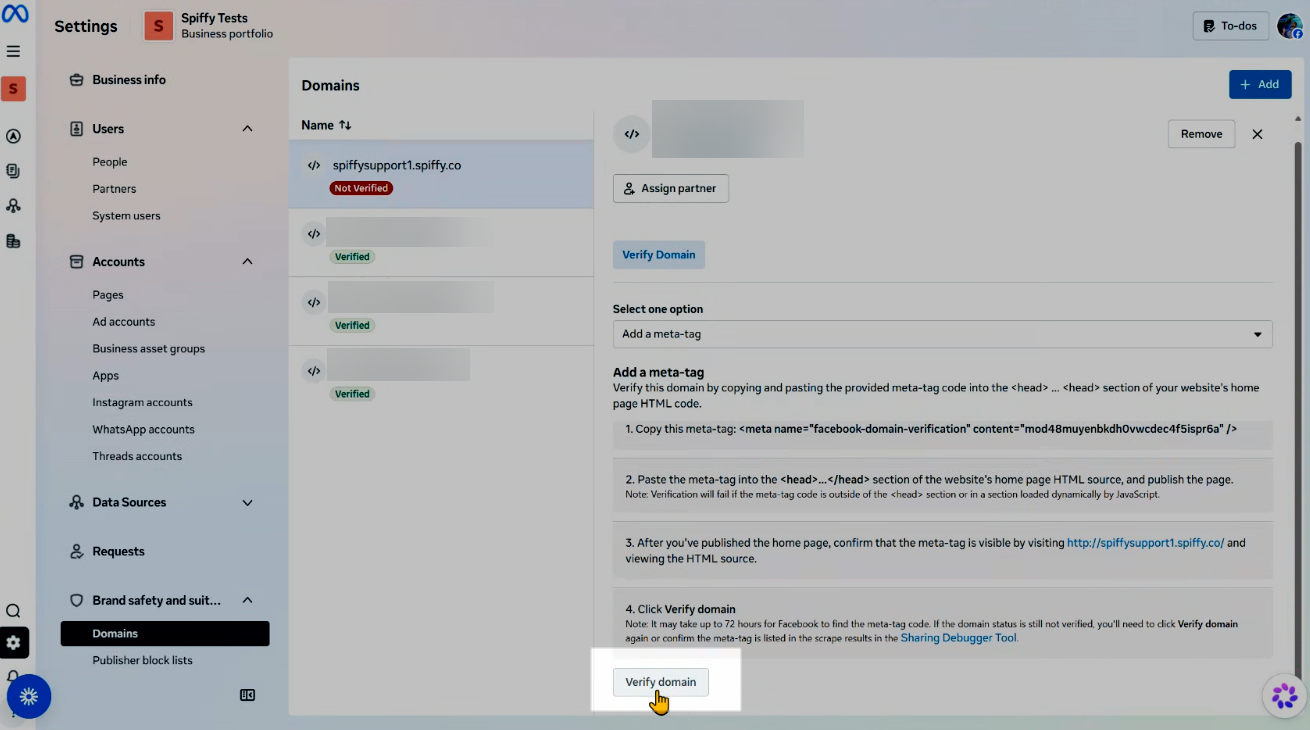
When you see the confirmation that your domain has been verified, you are all set!
Meta Pixel Events / Event Testing
Spiffy automatically triggers a number of useful events on Checkouts, when they are visited/used to purchase.
Spiffy triggers Page View and Purchase events, to track views of your main offer page, the thank-you page, as well as the one-click upsell offer page, if your Checkout includes one.
Examples include:
- Page View events – tracking the views of your main offer page, the thank you page, and/or your upsell offer page
- Purchase events – tracking the order total, the Spiffy order number, offer name, as well as individual pricing for your main offer, offer bumps and/or upsells
Purchase events will run regardless of upsell flow abandon. There may be a 2-hour delay or grace period after the flow is completed until this automation runs, to give customers time to accept or decline all upsells. If there are no upsells in the checkout flow, this automation will run immediately.
All Purchase events can be viewed in Automation Logs.
Event Testing
If you would like to test your checkout to see the Pixel Events that occur, just make sure you have enabled Spiffy’s Meta Pixel integration, and then from with the Meta Pixel Event Manager area, head to Test Events.
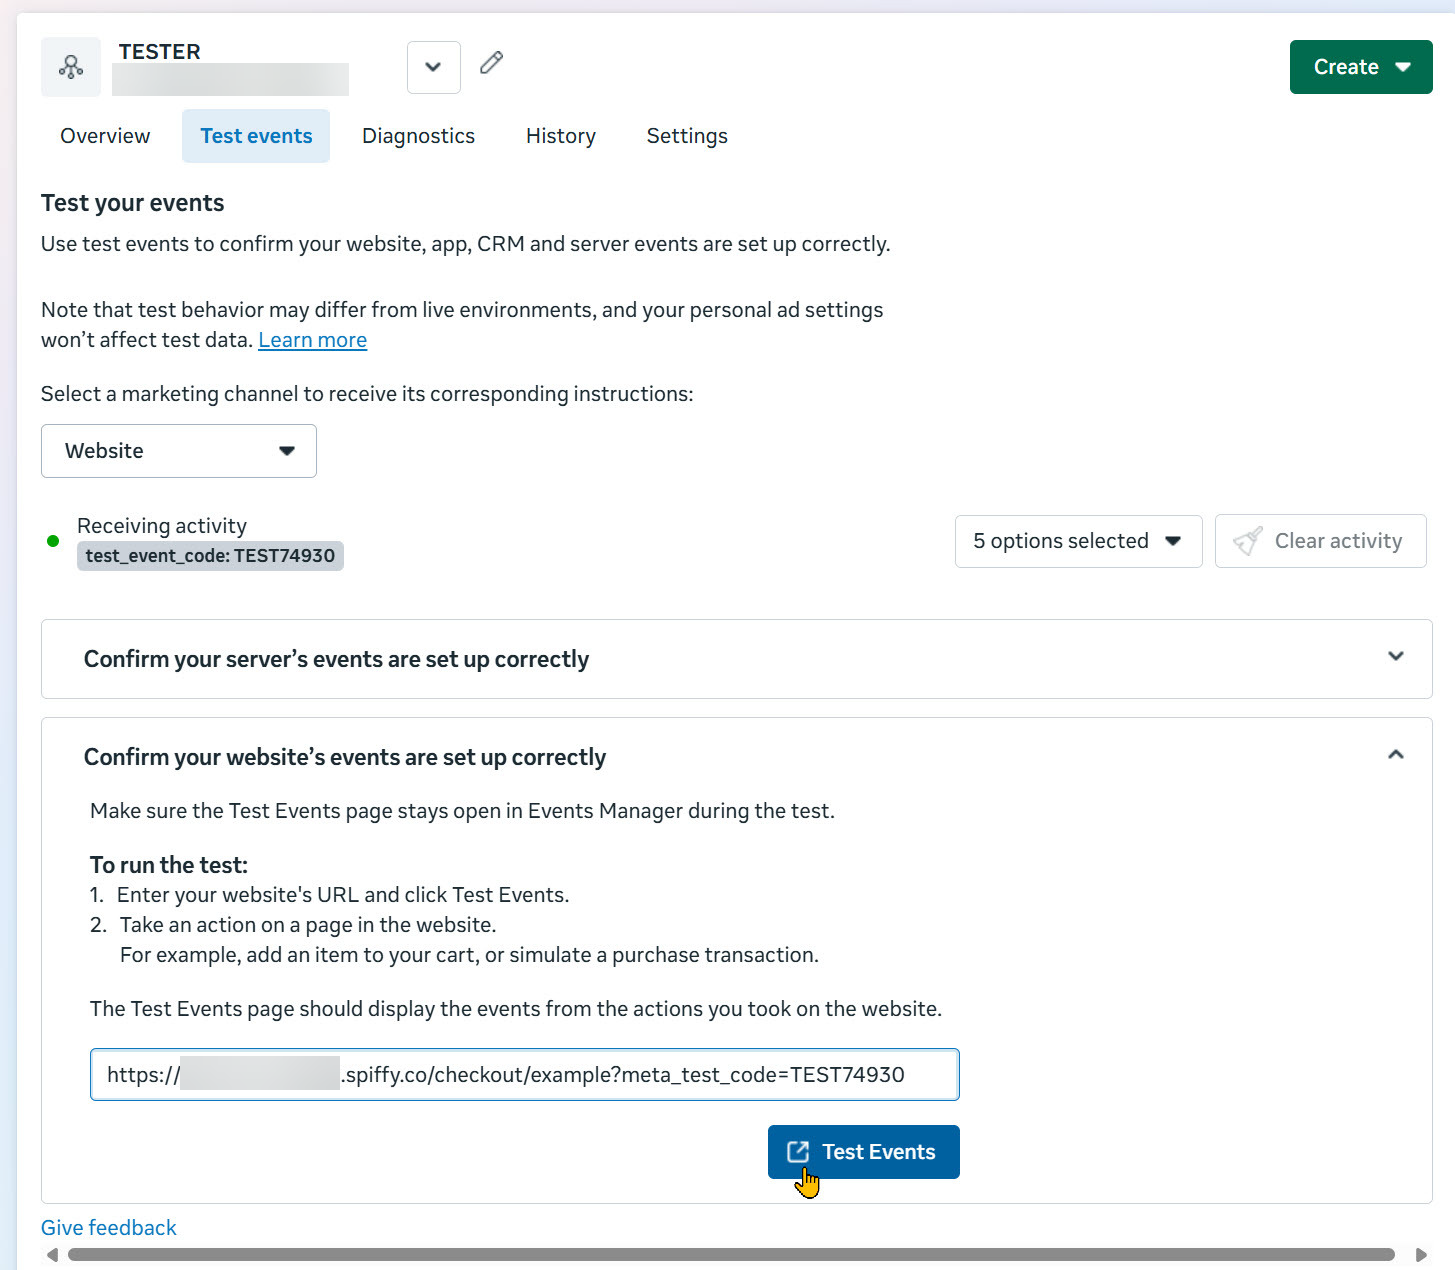
- In Meta Events Manager, open your pixel and go to Test Events. In the drop down, select Website.
- Open the section ‘Confirm your server’s events are set up correctly’ and copy the code shown (e.g.
TEST63024). - Open the section ‘Confirm your website’s events are set up correctly’ and paste in your checkout URL with the code appended:
https://your-domain.com/checkout/your-offer?_meta_test_code=TEST63024 - Complete a test purchase. If both the browser event and the server event appear in the Test Events feed, they will be deduplicated into one purchase using the same event id.
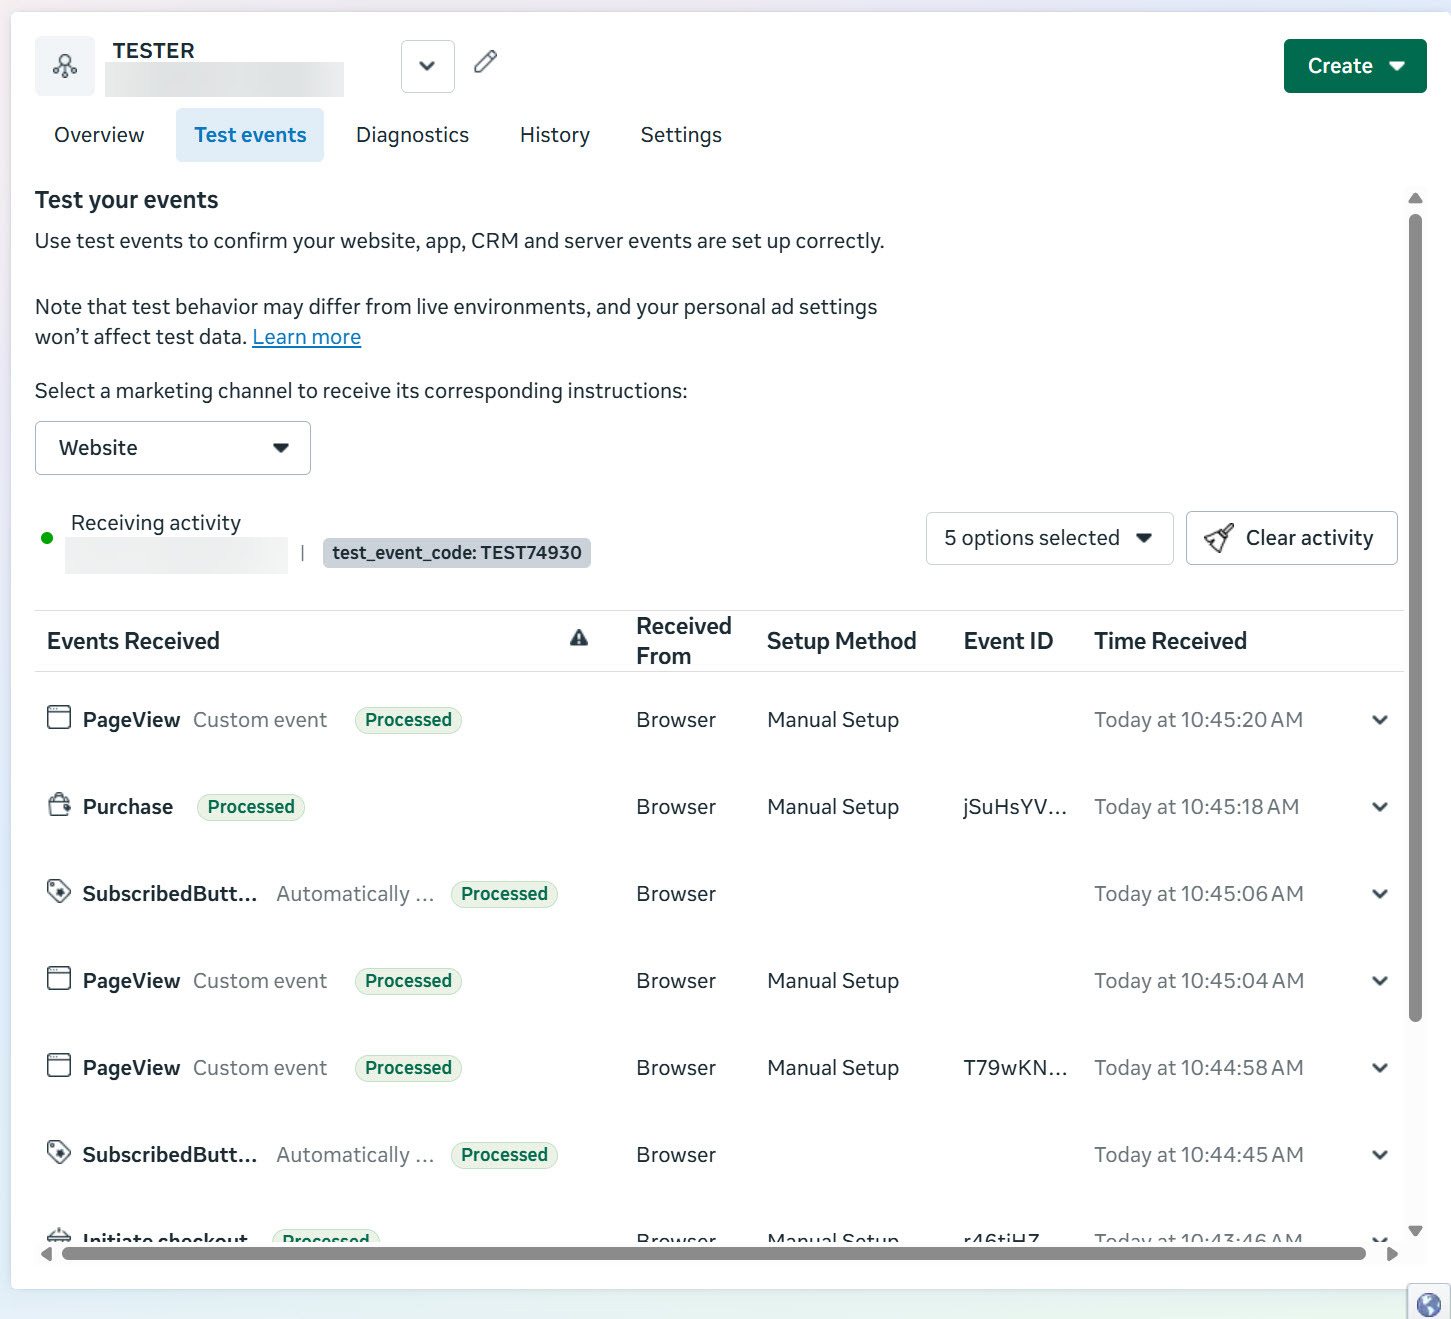
Pro Tip: Install Meta Pixel Helper in your browser to make it easier to see events in real time during testing.
For reference, here are the different page URL formats for your main checkout page, optional upsell page, and the default Spiffy thank-you page (You may be using your own custom thank-you page hosted on your website).
This may only be needed if you are using another system like Google Tag Manager:
(The bold sections of the URLs are placeholders and will be based on your Spiffy account name and checkout name)
– Main Checkout URL: https:// YourAppName.spiffy.co/checkout/Your-Checkout-Name
– Upsell Page (if applicable): https:// YourAppName.Spiffy.co/checkout/Your-Checkout-Name/offer
– Default Spiffy Thank-You Page: https:// YourAppName.Spiffy.co/checkout/Your-Checkout-Name/thanks
Next Steps – Meta Converion Pixel (Conversion API)
Now that you have set up and integrated your Meta Pixel, you have the option to also integrate with Meta’s Conversion API, for more reliable tracking. With the increase in Ad Blockers and Cookie Tracking Blockers, basic cookie based tracking has become less and less reliable. Connecting with the Conversion API will help remedy this.
Just head over to our Meta Conversion API Overview, for more information!