The quantity block makes it possible to set a specific amount and change the price dynamically based on the quantity your customer selects at checkout.

How to Add Quantity to a Checkout
The Quantity Input block is added from Block Options.
- Hover within a section and click Add block
- Select Options from the block type menu
- Select Quantity from the options type menu
- Configure your Quantity Settings.
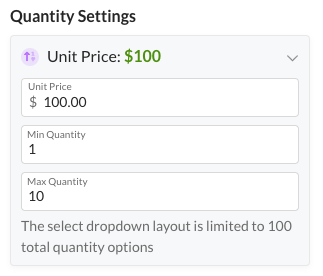
Quantity Settings
After you add the Quantity Input block to your checkout, a settings panel will display on the left of the screen. You can open this settings panel anytime by clicking on the Quantity block on the checkout canvas.
In the Quantity Settings, you can adjust pricing & display settings.
If you want to store the quantity selected as a value in a custom field, you can also map the quantity input to a Spiffy Custom Field, or an Integration Field. You will see the field mapping settings at the top of the sidebar when editing Quantity Settings.

This Quantity Input Block is a simple and linear quantity block, where you set a unit price, and the price changes by that unit price amount for every additional quantity purchased.
If you want to offer a discounted price for different quantities, you will need to setup normal Options with Price Modifiers, to have more control over the price for each quantity option. You would create a Dropdown Options block and set up price modifiers for each option to mimic the Quantity Select Dropdown layout below.
Learn more about Options and Price Modifiers.
Layout Settings
At the bottom of the Quantity Input Settings, you will see Layout Settings.

You can select either Quantity Input, or Quantity Dropdown
Quantity Input
Users can click in the field and type in any number, or click the +/- buttons to add or subtract quantity within the minimum and maximum numbers you set in the quantity input block settings.

Quantity Select Dropdown
Your customers can click on the dropdown field and select a specific number from the list of available quantities.
