When you click on Checkouts in the left navigation menu, you will see a list of your Checkouts. If you haven’t created a checkout yet, this is where you start building your first Checkout.
Create Products and Subscriptions first
If you haven’t created your Single Products and Subscription Products yet, you’ll need to do this before creating your checkouts. You can create a custom checkout without this step by using standard line items, but we highly recommend using Products for easier checkout creation and more flexibility with automation, reporting and affiliates.
Create Subscription Products
Create Single Products
Click on Create New Checkout at the top of the Checkouts page. This will start you in our checkout creation flow.
Our Checkout Creation Flow will take you through these steps:
- Set Internal name
- Edit Checkout URL
- Choose Standard or Subscription
- Choose a Product
- Set the Offer Name, Description & Pricing
- Set a Checkout Image (optional)
- View Basic Checkout or Enter Visual Editor
All the content and settings you set in the Checkout Creation Flow can be edited at any point from within the Visual Editor. Once you get to the end of the Checkout Creation Flow, you will be prompted to edit your checkout further in the Editor.
Set Internal name
Only you will see this name inside your Spiffy account. This is not a public-facing name, so you can use naming conventions that you may not want a customer to see. We will set the public-facing offer name in a couple of steps.

Edit Checkout URL
You can clean up, shorten, or change the URL extension of the hosted version of the Checkout. If you are planning on embedding your Checkout on your own website, this step is less important because the URL is not seen in the browser.

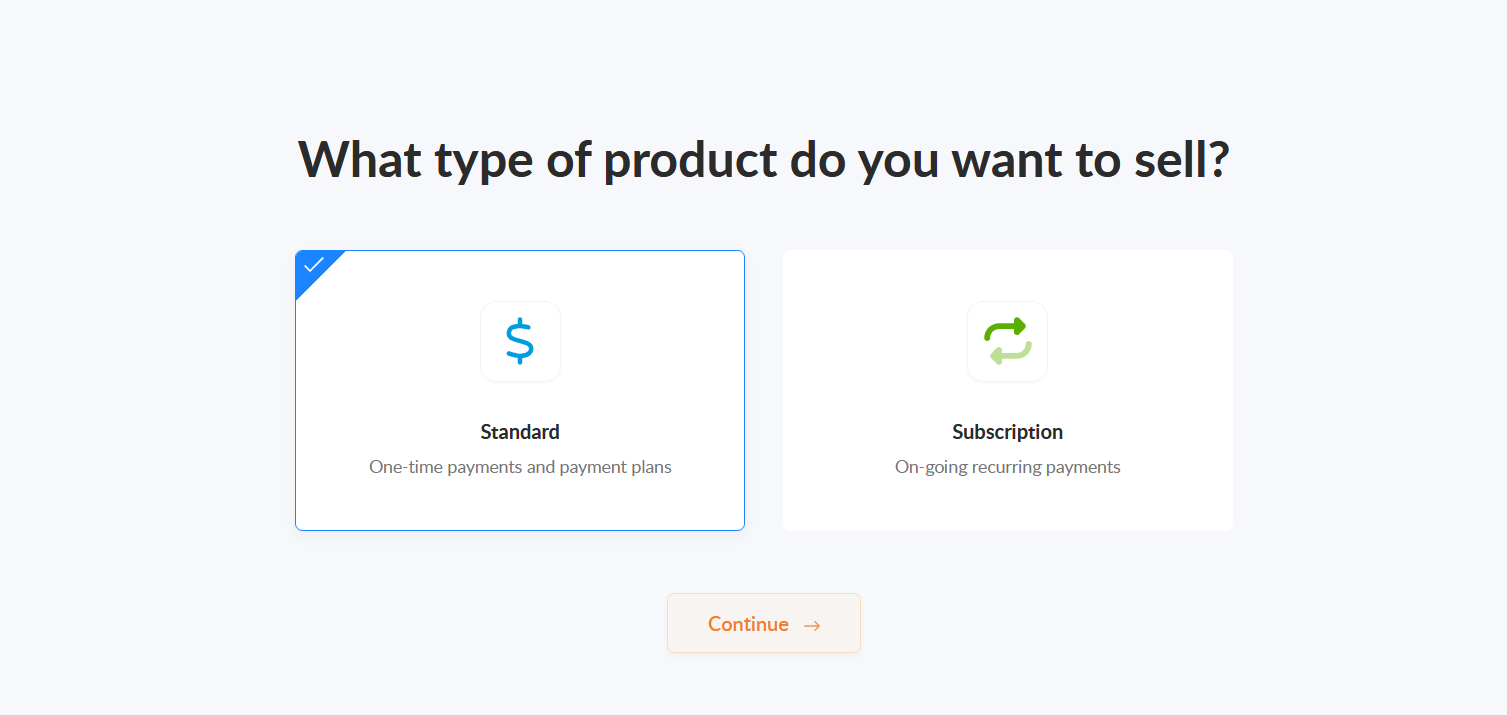
Choose Standard or Subscription
This step is designed to help streamline the setup for a basic checkout. Standard is for Single Products or custom checkout items that are paid in full or on a payment plan. Subscription is for Subscription Products and includes on-going recurring payments until cancelled.
Choose a Product
Select an existing Product from the dropdown. If you haven’t created a Product yet, you’ll need to do this first so that you can select it from the list.
Create Single Products
Create Subscription Products

For Subscriptions, you can add multiple plans to your checkout (eg: monthly, annual, etc). You can choose to add a paid/free trial, give a plan a call out, or make a specific plan selected by default. These settings can all be edited after creating the checkout as well.
The pricing and billing frequency for Subscriptions cannot be edited on the fly during the checkout creation process. If you need a different price or billing frequency, you’ll need to create a new pricing option or plan within your Subscription Product before adding it to your checkout.
Click here to learn how to create subscription products, options and plans.
Using Products is optional, but highly recommended. If you prefer to not use Products on your checkout, you can skip this step to create a custom checkout. Simply select Continue without selecting a product.
Set the Offer Name, Description & Pricing
This is where you set the public-facing offer name, description, and set the pricing for the offer. When using a Single Product or Subscription Product on your checkout, these fields will be pre-filled based on the Product selected. These settings are editable here, and also once you get into the Checkouts Editor, so you can make changes to the text and pricing anytime you want.

Set a Checkout Image (optional)
If you have a product or offer image ready to rock, you can upload it on this step. You can also add it once your checkout is created, from the visual editor. Click on either option, to finalize the Checkout setup.

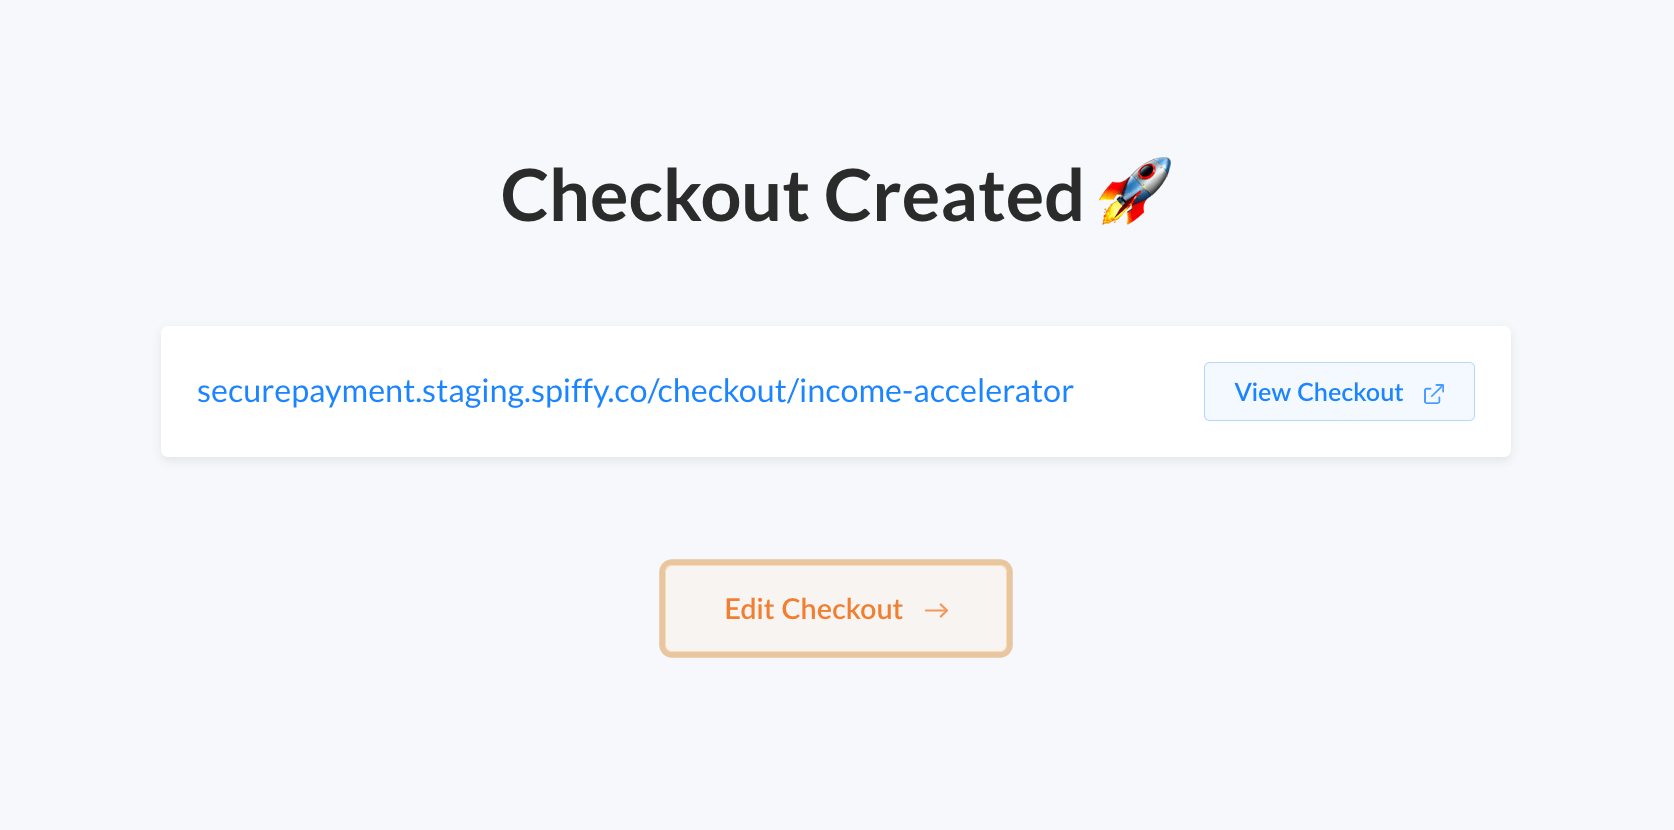
View Basic Checkout or Enter Visual Editor
Congrats! You’ve successfully created a basic checkout. You can now view your basic checkout, or jump into the Visual Editor, to add more functionality and customization. You can use the basic checkout to take payments on the fly, or even take a payment over the phone.
Click on Edit Checkout to open the Visual Editor.
Learn more about the settings and features in the Visual Editor