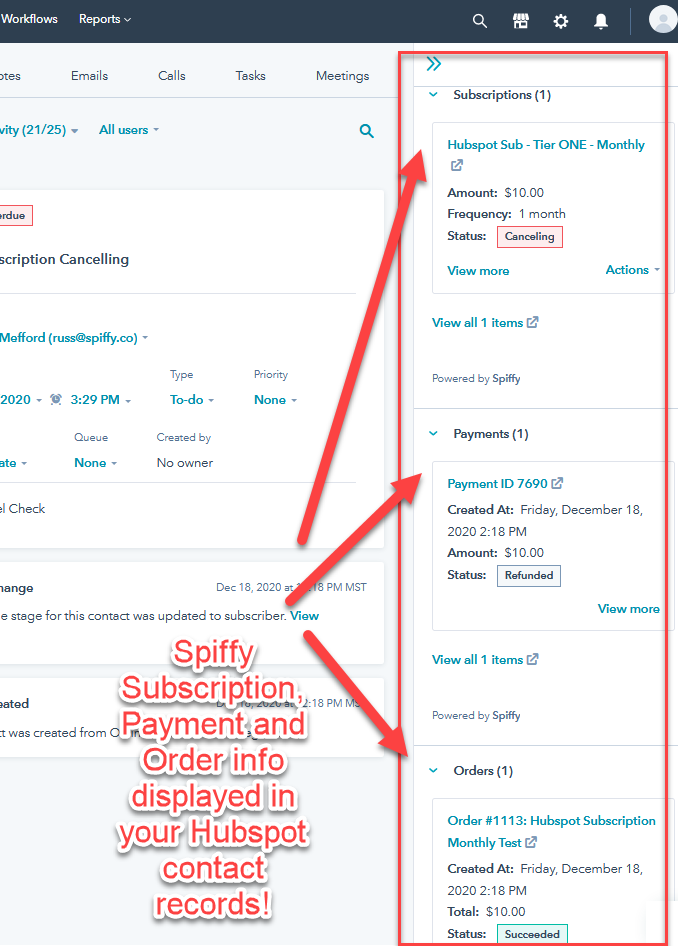
When you integrate your HubSpot account with Spiffy, you will automatically start seeing new customer orders, payments, and subscriptions, right in your HubSpot contact records. You can cancel a customer’s subscription, and even refund payments, right from the HubSpot contact record!

You will even be able to quickly get to your customer’s Spiffy contact and order records to manage their payments!
You will also be able to start setting up purchase and billing automation in Spiffy that can trigger actions in HubSpot, such as adding tasks.
Spiffy now allows you to trigger actions when the user purchases a product, an upsell product or an add on.
Here is the list of actions you can trigger in HubSpot when the user makes any type of purchase event (main offer, upsell, and/or bump add-on):
- Update Contact Email Subscription
- Add/Remove Contact to Workflow
- Add Task
- Add/Remove Contact to List
- Create Ticket
Getting Connected
In Spiffy, click on Settings > Integrations in the bottom left navigation
From the list of available Integrations, select HubSpot
Click on ‘Connect HubSpot’. You will be redirected to HubSpot to authorize the connection with Spiffy
Once Authorized, you will be redirected back to Spiffy, and HubSpot will now be connected!
Enabling Spiffy Timeline Events in HubSpot
After you have connected your integration between Spiffy and HubSpot, you will have the option to enable Timeline Events in HubSpot.
In ANY HubSpot contact record, click on Filter Activity and enable Spiffy, located under the Integration section.

Here is a preview of what Spiffy Timeline Events in HubSpot will look like

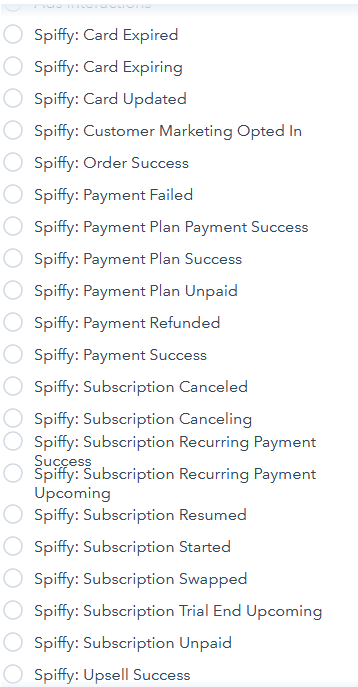
You will also have the ability to use the following Timeline Events to trigger Workflows in HubSpot

For more in-depth information on HubSpot workflow setup, please see HubSpot’s documentation on Getting Started with Workflows